Dark Room Experiments-
|
The darkroom-The main use of the dark room is to allow you to print your images in a traditional way without the use of a camera.The room is completely dark but includes a red light called a "safety light".The light is red because the film that is used is light sensitive and with a white light would become overexposed and would turn fully black through the process. The rooms equiptment includes: >Safety light >Photogenic paper >Print tongs >Paintbrush >Enlarger >Darkroom tray >Stopwatch >Developer. >Stop bath >Fix >Dryer |

|
Man Ray-
|
He was an American visual artist known for his solarisation photography. He rediscovered how to take pictures without the use of cameras. He was able to do this by placing objects directly onto light sensitive paper, then exposes it to light, this creates a photogram. He used a technique called solarisation which makes part of the image a negative and another part a positive depending on how much light exposure that part of the photographic paper receives. |

|

|

|
Photograms-
|
What is a photogram?- A photogram is a photographic image made without a camera by placing objects on a light sensitive material end then exposing it to light.Depending on the translucency of the objects the result is a negative shadow image varying in tone.If the paper received no light the colour will be white however if the object is semi-transparent the paper will turn grey.The colour of the paper also depends on the aperture as it might not receive enough light to change colours completely. A photogram uses an enlarger which is a form of projector that shines light through the negative and enlarges the negatives of the image captured on to the photographic paper.The images created are orthochromatic meaning the safety light-dim red light-will NOT damage the images.The focus finder makes sure that the image will show up clearly. There are 3 trays of chemicals:Developer,Stop bath and Fix. There is also a holding bath filled with water.The image should be left in the developer for 2 minutes and the stop bath for 30 seconds.To work out how long you place your image in the fix is:Place a piece of new film into the fix and time how long it takes for the film to go clear.The time on stopwatch should be doubled and that's how long your image should be left in there.Finnaly place your image in the holding bath for around 30 seconds to wash it and then place the image through the dryer.To transfer the image from chemical to chemical you MUST use the tongs provided.
Test Strip- A test strip is a series of exposures on one single bit of photographic paper and is used to determine the optimal length of time the image should be exposed to the light.This allows you to produce the best image.
When creating my own test strip I set up the photogram how I wanted for my final print.I then used a black bit of card and covered most of the paper allowing one strip to be shown-called my first strip-under the enlarger for 2 seconds.I repeated this 3 times moving the card down each time to create 3 strips.The first strip was exposed to the light for 6 seconds ,second for 4 and the third for 2.Once it was developed I could see which exposure worked the best.For me it was 6 seconds-first strip. |


|
|
|
|
|
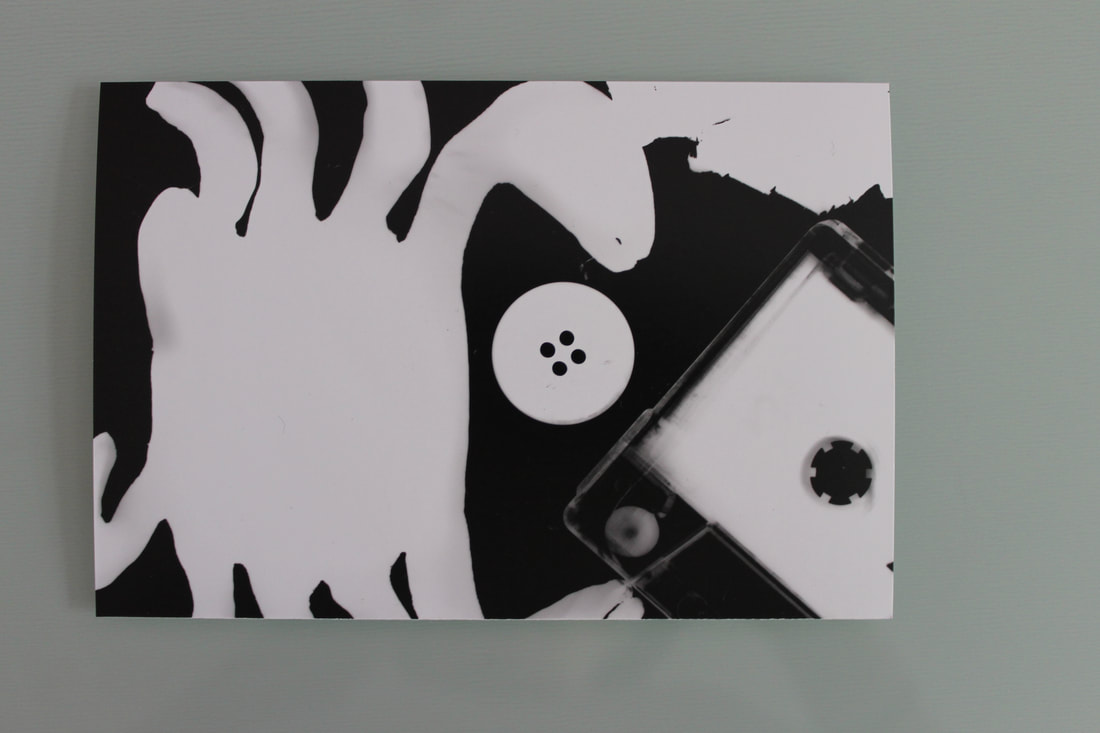
Painting on developer- This process gives a liquid, painting effect.This is done by using a paintbrush. Process-First you place place your photographic paper under the enlarger with the safety light on. Then position your objects on top of the paper. Remove the safety light and then set your exposure timer. Once its developed, instead of placing the photo In the developer you use a paintbrush and dip it into the developer then you would splatter the developer on random places of the image to create this effect. You then repeat the normal process and use stop then fix for the correct 30secs then around 3mins. This then only develops some areas of the photogram which gives an abstract affect. |

|


|
Double exposure- This is the process where you're left with an effect of double images with objects overlapping. To create a double exposure photogram you need top find the correct exposure time and then work about how many times you want to move your objects in your image so that they aren't fully exposed and you can see the separate exposures. Process-First you place your photographic paper under the enlarger with the safety light on. Then position your objects on top of the paper. Remove the safety lens and for me I moved my objects 3 times ,every time with a 2 second exposure(in total 6 seconds). Develop your photogram. Finnaly this process gives the effect that your objects are moving and a double image. |
|
|


|
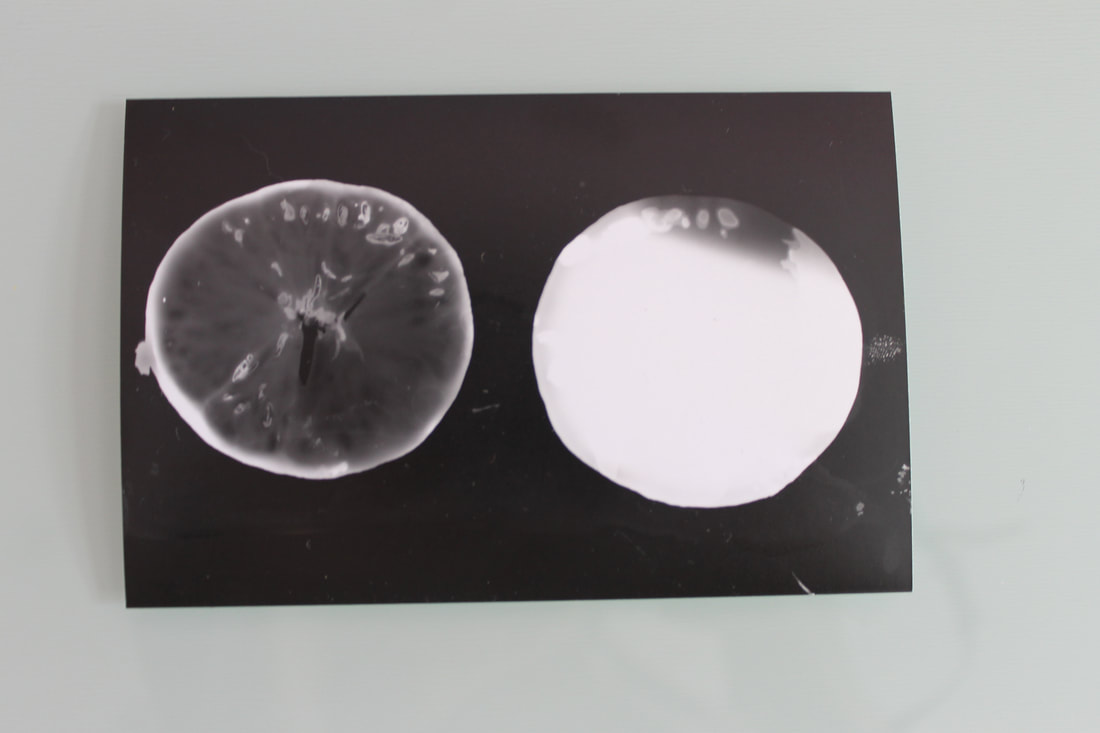
Solarising- This is a technique used to create the effect of tone reversal this is done by re-exposing your images after you begin developing.
Process- First place your photographic graphic paper underneath the enlarger with safety light on. Then position your objects on top of the photographic paper. Remove the safety light before turning on the exposure timer. After you place your photogram in the developer and when the image begins to appear remove it. Next re-expose your image under the enlarger once again. Develop your photogram and you should see a lighter edge around the objects you printed. |

|
My Best Photograms-

|
Overall-
This project allowed me to have a greater depth of understanding of the enlarger machine and become familiar of the different parts of it.It showed me different ways of printing an image and also how many different processes and steps that go into creating just one image.My personal favourite is the double exposure.I think it looks really cool and the process of making it I really enjoyed.I think I correctly timed each exposure perfectly to enable to photogram top be clear and crisp-especially my second attempt.I think my least successful photogram was my sandwich print aa some of the materials I used didn't transfer well and overall the objects weren't as defined and as clear as I would like.This could be due to over exposure, next time I won't expose it for as long or I will choose different materials. |
Pinhole Camera-
|
What is a Pinhole Camera?- Its the simplest form of a camera and is based on the camera obscurer.Its a container that has been blacked out, except for a small hole that lets light through.This is aplied to the pinhole camera where you use and large can with a pinhole to create the camera.
My task was to successfully make a pinhole camera and use it to create many images.This includes-picture of a building, portrait, double exposure and a window picture. |

|
|
Equipment needed to make Pinhole Camera-
>Long can >Black duck tape >A pin >Pencil >Electrical tape >Black card >Ruler >Can opener How I made it- First I measured out a piece of black card which wars round the diameter of my can.Then I drew lines 1cm apart along the black card and 3.5cm down.Then using a can opener cut the lid of the can off.Cut the 1cm strips and wrap he cardboard round the can.Fold the strips to stick them all together to form a lid.Then cover the cardboard lid with duck tape to allow it to be light resistant .Finally using a pin pierce a tiny whole roughly in the middle of the can and cover with a strip of electrical tape. |

|

|
Building-
Crop these images (you can do it within Weebly). These images are the same.
|
Positive-

|
Negative-

|
Portrait-
|
Positive-
|
Negative-
|

|

|

|

|
Double exposure-
|
Positive-
|
Negative-
|

|

|
Window-
|
Positive-
|
Negative-
|

|

|
Overall-
I loved this project as I think its so cool how you are able to take photos using a can and a pinhole and create such an outcome.One difficulty I found was getting the correct exposure as on different days the light intensity increases or decreases which effects how long you have to expose your image for.I think my portraiture was the best as the person and even the background has such detail including the brand of the sweatshirt to the frames of the windows on the buildings.I also thought my double exposure was really good as well again due to the detail and the crispness of the image.I think my window was the worst as its bait blurry and doesn't have much character, and its also overexposed.Next time I will chose a window with more of a view and do more practice photos before.
I loved this project as I think its so cool how you are able to take photos using a can and a pinhole and create such an outcome.One difficulty I found was getting the correct exposure as on different days the light intensity increases or decreases which effects how long you have to expose your image for.I think my portraiture was the best as the person and even the background has such detail including the brand of the sweatshirt to the frames of the windows on the buildings.I also thought my double exposure was really good as well again due to the detail and the crispness of the image.I think my window was the worst as its bait blurry and doesn't have much character, and its also overexposed.Next time I will chose a window with more of a view and do more practice photos before.
Ben Nathan-

|

|
Ben Nathan experiments with different types of media including film, photography, painting and sculpture. He documents life in the city and urban areas. He created Pin Hole London in 2020, he put on programmes and many exhibitions including one in Wood Green Mall. He took pictures of people all around wood green blew them up and showed the positives and negatives. I really like the concept of the pin hole camera as captures the world in its natural form while going around with their daily life. |
SLR Camera-
|
SLR-Single Lens Reflex.This is a camera that typically uses a mirror and prism-like system that allows the photographer to view the exact image that they are going to photograph.The light from the image in front of you enters the lens before bouncing off an angled mirror and hits a pentaprism, directing the light to the viewfinder.Once the image is ready to be taken, the mirror retracts and the light is projected directly onto the recording medium. Finally you have your undeveloped photo.
Aperture- Its the section of the camera which can be adjusted to allow more or less light to enter.The smaller the aperture the less light can enter, therefore creates a darker image.This is located in the lens of the camera and is measured in F stops and every next size is half the one before.
Shutter Speed- This controls the time and how long the film is exposed for. A fast shutter speed creates a shorter exposure, while a slow shutter speed gives the photographer a longer exposure.Faster shutter speed creates a very clear and sharp image as it doesn't allow movement to be seen.Its located in the main body of the camera and is measured in fractions of a second |

In this task I learnt about the SLR camera and how it works. Light passes through a lens, which sharpens the image and controls the light intensity through a control called "aperture". You cannot expose it to light at any point through the process otherwise the film will be ruined. To load the film you open the back of the Camera and place it on the left side and start to unravel the film and place it in the gap |
Contact Sheet-
|
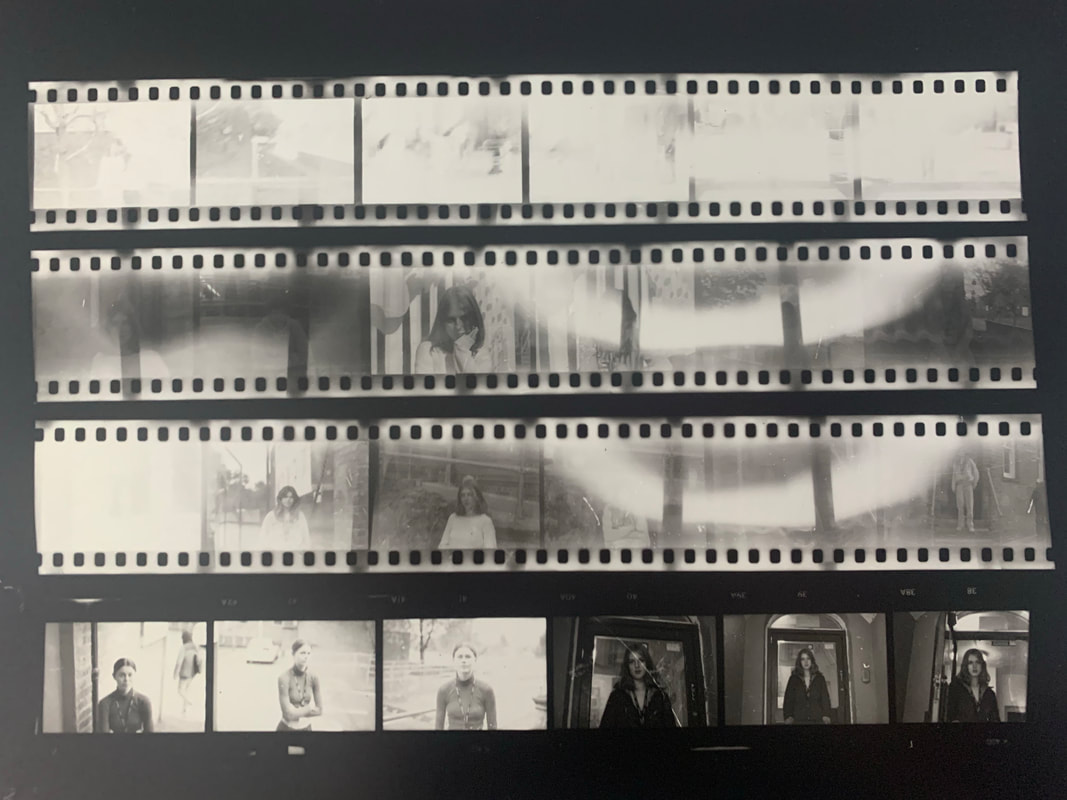
Contact Sheet- Its an online gallery of the best images from your shoot. It allows you to see the final images which you can choose from to print and it shows a preview of the final products . It's a positive print of all of the negative images from the film camera on a roll of 35mm film. The film should be cut into 6 frames and then to be placed in a 8x10 transparent protective sleeve.
|

|
Composition-
Composition- Means 'putting together' which can apply to any kind of art, from music to writing to photography. Its how you place your subject (and everything else) in you viewfinder.
